

If you want to keep your motorcycle in good condition, one of the aspects that you should take care of the most is the cleaning. In this case, we are not only talking about cleaning the exterior to keep the bodywork in good condition, but also about cleaning the carburetor.
In this article we are going to show you how to clean the motorcycle carburetor so that it is in better condition and thus extend its useful life.
When should the carburetor be cleaned?
Unlike what happens with the bodywork, the dirt of a carburetor is less visible to the naked eye, so it usually goes somewhat more unnoticed. However, the motorcycle can show us some symptoms that we can interpret as the time has come to clean the carburetor of the motorcycle.
One of the first symptoms is when it is more difficult for the bike to start. In addition to this, we will also notice that we must clean the carburetor when the acceleration is slower, the consumption of the bike is above normal or you notice a strong smell of fuel.
It can also leave other more obvious physical signs, for example, when it gives off a trace of soot. If you detect any of these aspects in your motorcycle, it is time to carry out a carburetor cleaning.
What materials do I need?
When cleaning a carburetor you will need a screwdriver and a wrench. These materials are necessary to be able to remove the different covers and screws that allow access to the carburetor.
What you must keep in mind in this case is that it is possible to damage the motorcycle, so you must be careful. For example, you must be very careful with the rubber parts of the bike to avoid damaging them with the carburetor cleaning product.
In the case that you want to disassemble it, the damage you can do to the bike is related to the care you take when putting or removing the screws and, of course, make sure that everything is properly connected once you have cleaned it and you are going to assemble it again.
Is the assembly and disassembly process easy?
Another of the most common questions is whether the assembly and disassembly process is complicated. It is not really complicated, however, as a tip we recommend you to take pictures with your cell phone to remember how everything was assembled as you disassemble it.
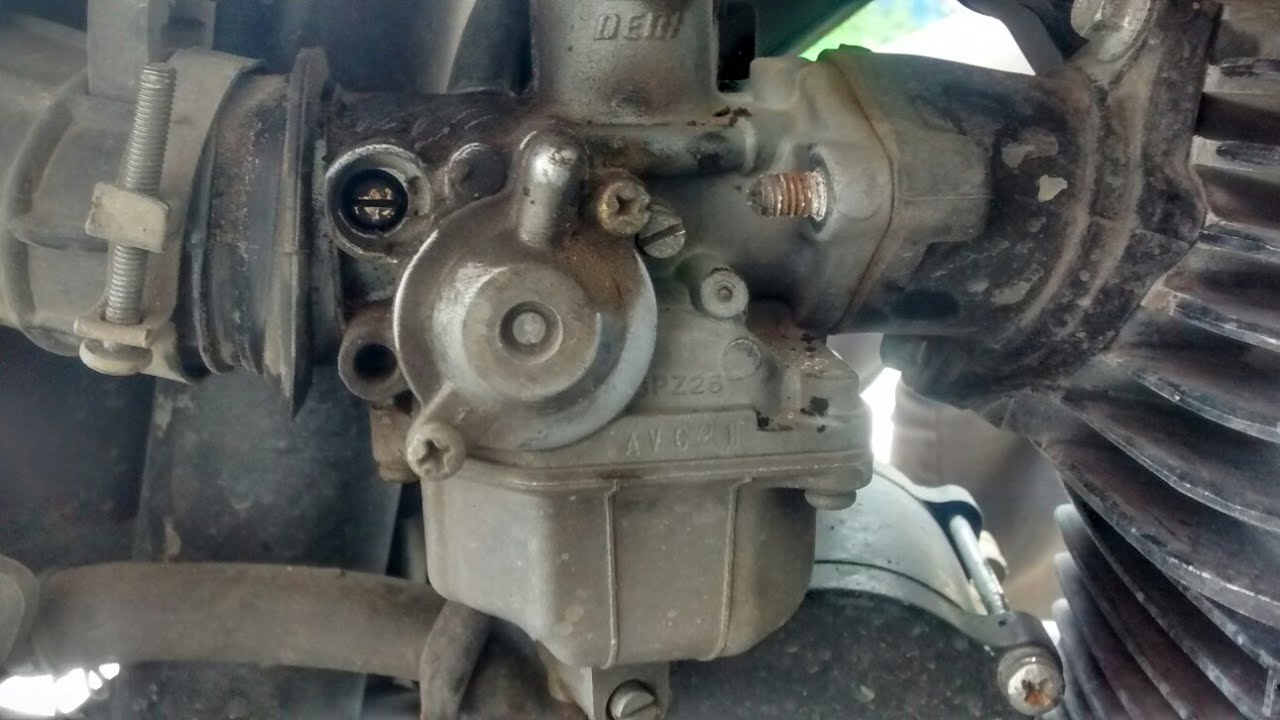
As if it were a kind of puzzle, the carburetor is usually found behind the engine and is shaped like a heart. To access it you will have to remove some parts which, of course, it is important to put them back in the right way to avoid damaging the bike. Help yourself with the pictures and you will have much clearer the piece that goes in each place.
Carburetor cleaning step by step
Let's see how to clean a motorcycle carburetor. The first thing to do is to park your motorcycle in a flat place and, of course, that it is turned off. From here you will start to remove the different covers that protect the elements of the bike in search of the carburetor. As we have mentioned, it is usually located behind the engine.
Locate the reserve fuel tank and close it completely to avoid fuel leaks. It is best to place a container underneath, and open the tank again so that a liter of gasoline comes out to lubricate the parts.
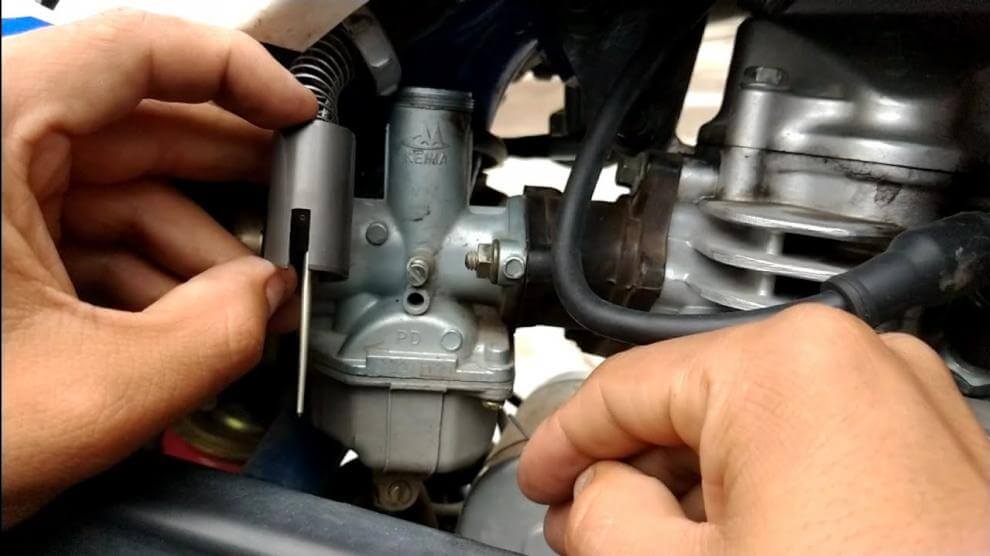
Open all the connections, the fuel hose, electricity cable and throttle cable to be able to extract the carburetor. In addition, you will also have to get rid of the air inlet and outlet clamps.
Next to the battery you will see a plastic box in which the air filter is located, you will have to loosen the screws that hold it in order to free the carburetor completely.
Now, with the carburetor loose, simply remove the screws of the upper and lower cover and start cleaning. Clean each of its parts carefully with the gasoline from before, do not use water. Use a toothbrush to brush the part and clean it carefully.
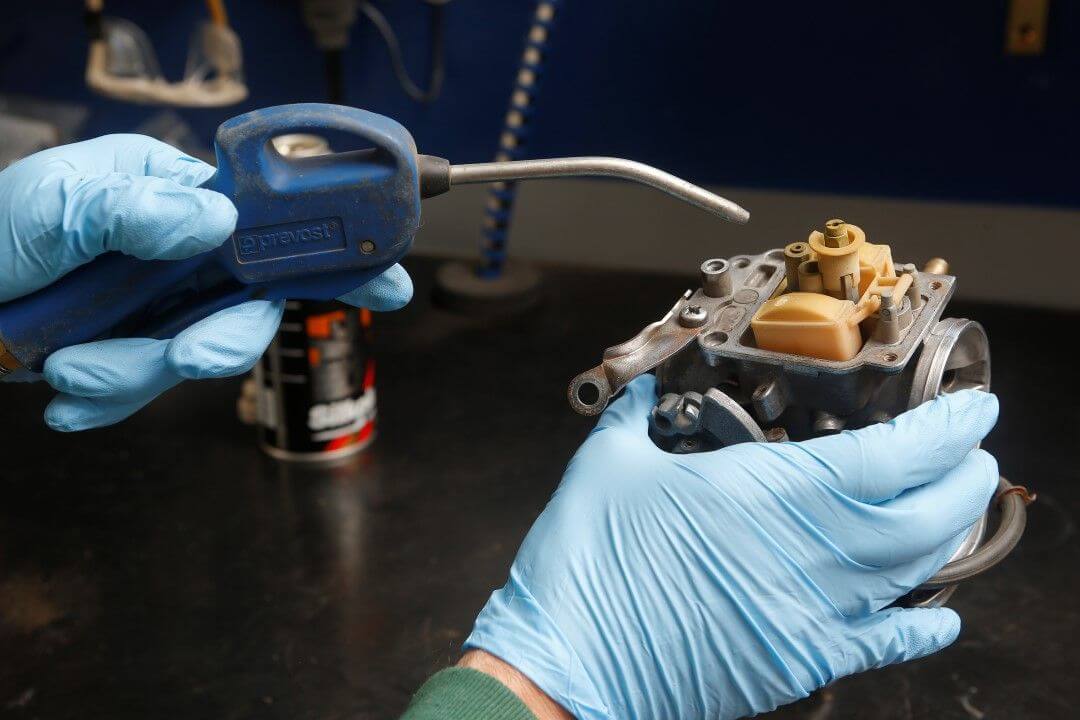
If you have problems to remove the dirt you can use a specific product or an air gun, but never use water. Let the parts dry carefully so that they do not catch air particles and, when everything is ready and dry, it will be time to reassemble the carburetor of your bike completely clean.
This is the perfect moment to take advantage of the photos you took to reassemble the bike little by little helping you with them. Be sure to tighten the bolts well so that nothing comes apart over time.
Finally, the time it takes to clean the carburetor of a motorcycle is variable. It will depend on several factors, for example, the type of motorcycle, how dirty it is and also the skill in assembling and disassembling the parts. As a general rule, the time needed to clean a motorcycle carburetor is between 30 minutes and 2 hours.
Remember that it is essential to keep the carburetor of your motorcycle in good condition to avoid major problems. Follow these tips on how to clean a motorcycle carburetor and you will not only be able to extend the life of your carburetor, but also that of the whole motorcycle.