

The valves of a motorbike have a very important function in the operation of the motorcycle. These valves are in charge of getting the fuel into the engine and extracting the exhaust gases.
In order for these valves to be able to do their job to the best of their ability, they must be able to close without any problems. The valves carry out their work at very high temperatures, around 1000 degrees Celsius, so it is common for them to expand somewhat over time.
For this reason, it is important to carry out a motorbike valve adjustment to ensure that the valves can perform their function correctly. In this article we will show you how to do a motorbike valve adjustment so that your bike is always in the best possible condition.
When to adjust the valves of a motorbike?
The first thing you need to know is when to adjust the bike's valves. To know the exact time it is important that you refer to the model of motorbike you have. This is because each manufacturer may recommend different times, as each bike is different.
You should also consider how well the bike is in good condition or how long it has been used. An older bike that is used less often will not be the same as a more modern bike that is on the road all day. With this in mind, it is usually best to have the valves adjusted every 40,000 kilometres.
What do I need to adjust the valves of a motorbike?
Unlike other maintenance tasks that can be carried out on a motorbike, valve adjustment is not so simple. A motorbike valve adjustment can cost around £200, depending on the shop you go to.
Although how to do a motorbike valve adjustment is complicated, what you can do well is to check the valve clearance. This way, if you take a look at the valve clearance you will be able to know better if your bike needs adjustment or not. To check the valve clearance all you need is a set of feeler gauges.
How to check motorbike valve clearance
The first thing to keep in mind is that this process should be done in good light and with the bike cool. Find a good place where you can be calm to start the procedure.
Before you start, you also need to know the clearance set by the manufacturer. Knowing this is essential as it can change depending on the bike. Each valve has a specific clearance, so not only will these values change from bike to bike, but they will also be different from valve to valve.
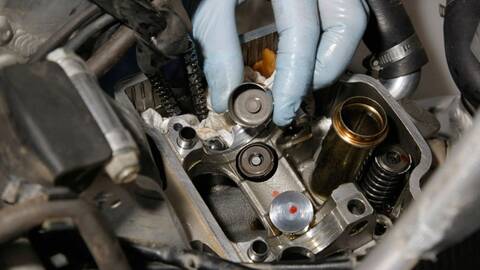
Equipped with the gauges, the first thing to do is to remove the spark plug(s) and lift the cylinder head cover. Lift the cover until you can see the camshaft, which is responsible for opening and closing the valves on your bike.
With the camshaft in view and equipped with your bike's manual, you should find the position of the screw through which you can move the crankshaft. It is important that you find this screw so that you can position the piston at the highest point. Each engine has specific markings so that you know where the piston is at all times, so keep an eye on it until you find it.
It is possible that your bike does not have these indicators, either because the bike is old or because it does not have them at all. In this case you can use something that does not damage the piston head, for example, a straw. Put the straw through the spark plug hole, taking care that it does not fall into the cylinder.
This will tell you when the cylinder is at its peak, which happens a couple of times in a four-stroke engine.
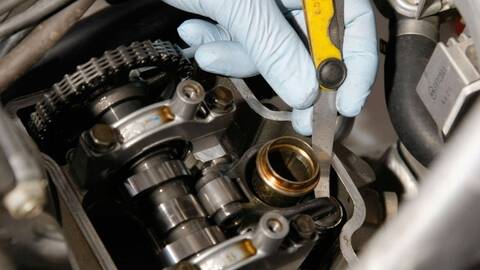
Now you are ready to check the valve clearance. Just locate the rocker arm head and insert the appropriate gauge. To find out if it closes properly, the gauge will have to go in and out fairly without forcing.
If the clearance on your bike is 05 mm and a 0.7 mm gauge fits without any problem, you will know that the clearance is excessive and you will have to make the corresponding adjustment. Take your bike to a reliable workshop to have your bike adjusted. Thanks to this procedure you will know when your bike needs adjustment and you can avoid unnecessary visits to the garage.